
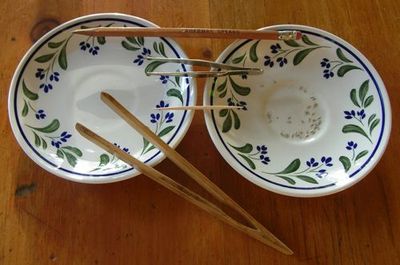
So at last we have arrived at the final post on making soil blocks. Unfortunately, I'm now separated from my blocks (a condition not quite as traumatic as being separated from one's newborn baby, but close), so I cannot give you a picture of them, dang it. Instead, I offer a photo of the high-tech tools needed to plant blocks:
But let us begin at the beginning.
Molding:
The official sites recommend adding water to the soil mix until it reaches a soupy consistency or slurry. One fills, or charges, a mold by pushing it forcefully downwards through this muck, twisting as one drives it to the bottom of one's container. Once there, a twist will release the suction and allow one to lift the mold clear.
I, of course, did nothing of the kind. I'm the kid who, in eighth grade art, used charcoal like a fine pen and laid a pen sideways to lay a broad swath across the paper. So of course I didn't follow the directions.
Instead, I dragged the mold repeatedly through the slurry, pressing it against the side of the container. (If one uses this technique, a rectangular container offers significant advantages over a conventional bucket.) Then I started using a trowel to press excess soil into the blocks. Finally, with the micro 20, I used my fingers.
The basic principle remains: the more soil one manages to pack into the molds, the firmer the blocks will be, and the better they'll hold together.
Many people report having significant difficulty in getting blocks to hang together. Right from the beginning, mine held together pretty well, so clearly the coconut coir was doing its job of binding the other ingredients. Equally clearly, the word on the web was right: it's worth mixing at least an approximate version of the recommended soil mix; doing so will solve a lot of problems and avoid a lot of irritation.
Arranging:
One major problem for many is handling the small blocks once they're made. The big ones (2” per side) can be lifted by hand, but the little ones are so small that it's hard to touch them without squashing them. The answer? Another theft from the kitchen: bamboo toast tweezers. Jason Beam does sell a pair of metal tweezers for handling the small blocks, but the bamboo ones work so perfectly that I'm not even tempted. They fit the sides of the blocks almost exactly, and they're flat on the inside, so they
The picture-essays on the website show micro blocks being planted just as they emerge from the mold, which means that there's virtually no space between them. That space, though, provides both needed oxygen (much of which has been pressed from the soil itself) and, one hopes, a gap that will confine each block's roots to that block. So I set out to line my soil blocks up in rows, with just enough space between them to accommodate the tweezers.
The official website suggests setting blocks on a flat surface and watering them with a mister. Because I'd decided to try bottom-up rather than top-down watering, I put mine on old towels cut to fit the trays I used. The essential thing here is to leave a space at the edges of the container. This will give you an inch or so of block-free towel onto which you can pour water.
Planting:
Each block arrives with a little divet in the top, ready to receive a seed. Fine. But the divets on the small blocks measure less than a quarter inch across. So here's the problem: how does one get something the size of a lettuce or tomato seed into such a small space?
Again, Jason Beam's website solves the problem, giving me a new and invaluable technique for handing small seeds. Start with two saucers, one dry, one holding a bit of water. Pour a few seeds into the dry saucer, wet a toothpick, and then touch the toothpick to one of the seeds. In most cases the seed will adhere to the damp wood, so the toothpick can convey the seed to its soil block and tuck it into place. Conventional bathroom tweezers are useful for picking up larger seeds.
Oddly, I haven't seen anything about covering seeds once they're planted. (Maybe I haven't looked hard enough.) Call me a slave to convention, but I covered all mine anyway. In the flush of new ownership, I used tweezers to drop a bit of extra soil mix onto the seeds in the large blocks, but that got old pretty quickly; in the end I treated both large and small blocks the same way, using a toothpick to push a bit of extra soil over the seed.
The Care and Feeding of your blocks: watering
Because blocks are quite fragile, they can't be watered in any conventional way; they'd just disintegrate. As suggested above, two methods work, alone or in combination: watering from below, and misting from above. The former requires some sort of absorbent mat which holds water; the latter requires a fine mister.
I'm using old towels as mats, and misting when the blocks seem to need it. The mat might be a problem later as roots can grow into it, but it's certainly the simplest way to water, especially as I remembered (!) to leave an inch or two of mat bare at the edges, so there's a place where I can pour the water. Misting avoids that root problem and assures that the top of the blocks, where the seeds lie, get water, but misted blocks require twice-daily attention. Mine, sitting by a south window where they get several hours of direct sun daily, have needed watering only several times a week. (Bear in mind, though, that that's in Montana, and temperatures in our house still rarely reach 70ºF.)
Because they're quite small, blocks can only hold a seedling for a couple of weeks before they need to be transferred to a larger home. One can purchase (quite cheaply) attachments for the 2” mold which replace the usual rounded divet with a square hole, just the size of a mini-block. When the seedlings in the small blocks are ready to transplant, one can just fit them into these holes in larger blocks.
Unfortunately, as I mentioned in my last post, this is the main task I didn't get to before leaving Montana, so I cannot report on its ease or efficacy. I shall, though, when I return–which puts the lie, of course, to my opening promise that this is the last soil block post. Ah, well.
 Subscribe to RSS feed


Although I love the commentary, there are a couple of suggestions:
1.) Covering is not necessary for most crops except cole crops or brassicas. And, even then, sheets of black plastic are superior to lightweight potting soil which doesn’t “seat” the seed in the soil.
See our You Tube tutorial at http://www.pottingblocks.com for more covering help.
2.) Soil Blocks are NOT fragile, IF they are made correctly (compacted), and made with at least 1/2 part peat moss with no more than 1/2 to 1/3 coco peat.
Jason Beam’s Potting Blocks
You wouldn’t know it, but I was in fact most flattered that you took the time to comment here, Jason. I have to say, though, that I’m not sure what “covering” refers to here. Guess I’ll have to check out that tutorial.
–Kate